Pages

Wednesday, July 30, 2014

Gender Reveal Party!

I've always wanted to put together a "Gender Reveal Party", so when my sister told me that she was going to order a cake and invite everyone over to reveal the gender of her next baby, I jumped at the chance to add a little more flair to the party.  I only had a few days to plan it, but I think it came together really well!

Here is a shot of the display as guests entered the house.
Guests were invited to "cast their vote" using blue or pink paint chips.
And since coming up with baby names can be difficult, guests were also invited to submit their baby name suggestions.
Using good ol' sticker paper, I decorated plastic cups and paired them with blue and pink straws.  My sister prepared PINK lemonade and ice tea - served in a BLUE pitcher, of course! :)
I wish I had snagged a picture of the actual cake, but amongst all the excitement and anticipation, it totally slipped my mind.  So what are my sister and her husband expecting??  A baby BOY!!!  Congrats to them both!


-Ashley


Friday, July 18, 2014

Desk Makeover

I loooove farmhouse tables.  In fact, one of my very first furniture projects was this beauty!
I scored her off Craigslist for $200 and my husband and I went to work.  He sanded her down entirely and I stained.  Like I said, it was my first project so it's not perfect, but I definitely learned a thing or two and I love her.  AND she's the perfect table to handle a toddler. :)

When I saw this desk at an antique store, I had to have it and give it a little farmhouse update.

I started with three coats of General Finishes Snow White on the body and the drawers.
Then I did three coats of General Finishes Java Gel Stain for the top.
I loved the original hardware, so I didn't touch a thing there, but I did line the drawers with some really cute orange paper.  And here she is!


It may have been a pretty straight forward makeover, but I think it really gave this table new life.  It would look fantastic in any home either as a desk or even an entry table.  The possibilities are endless!

-Ashley


Tuesday, July 15, 2014

Rustic Kitchen Sign

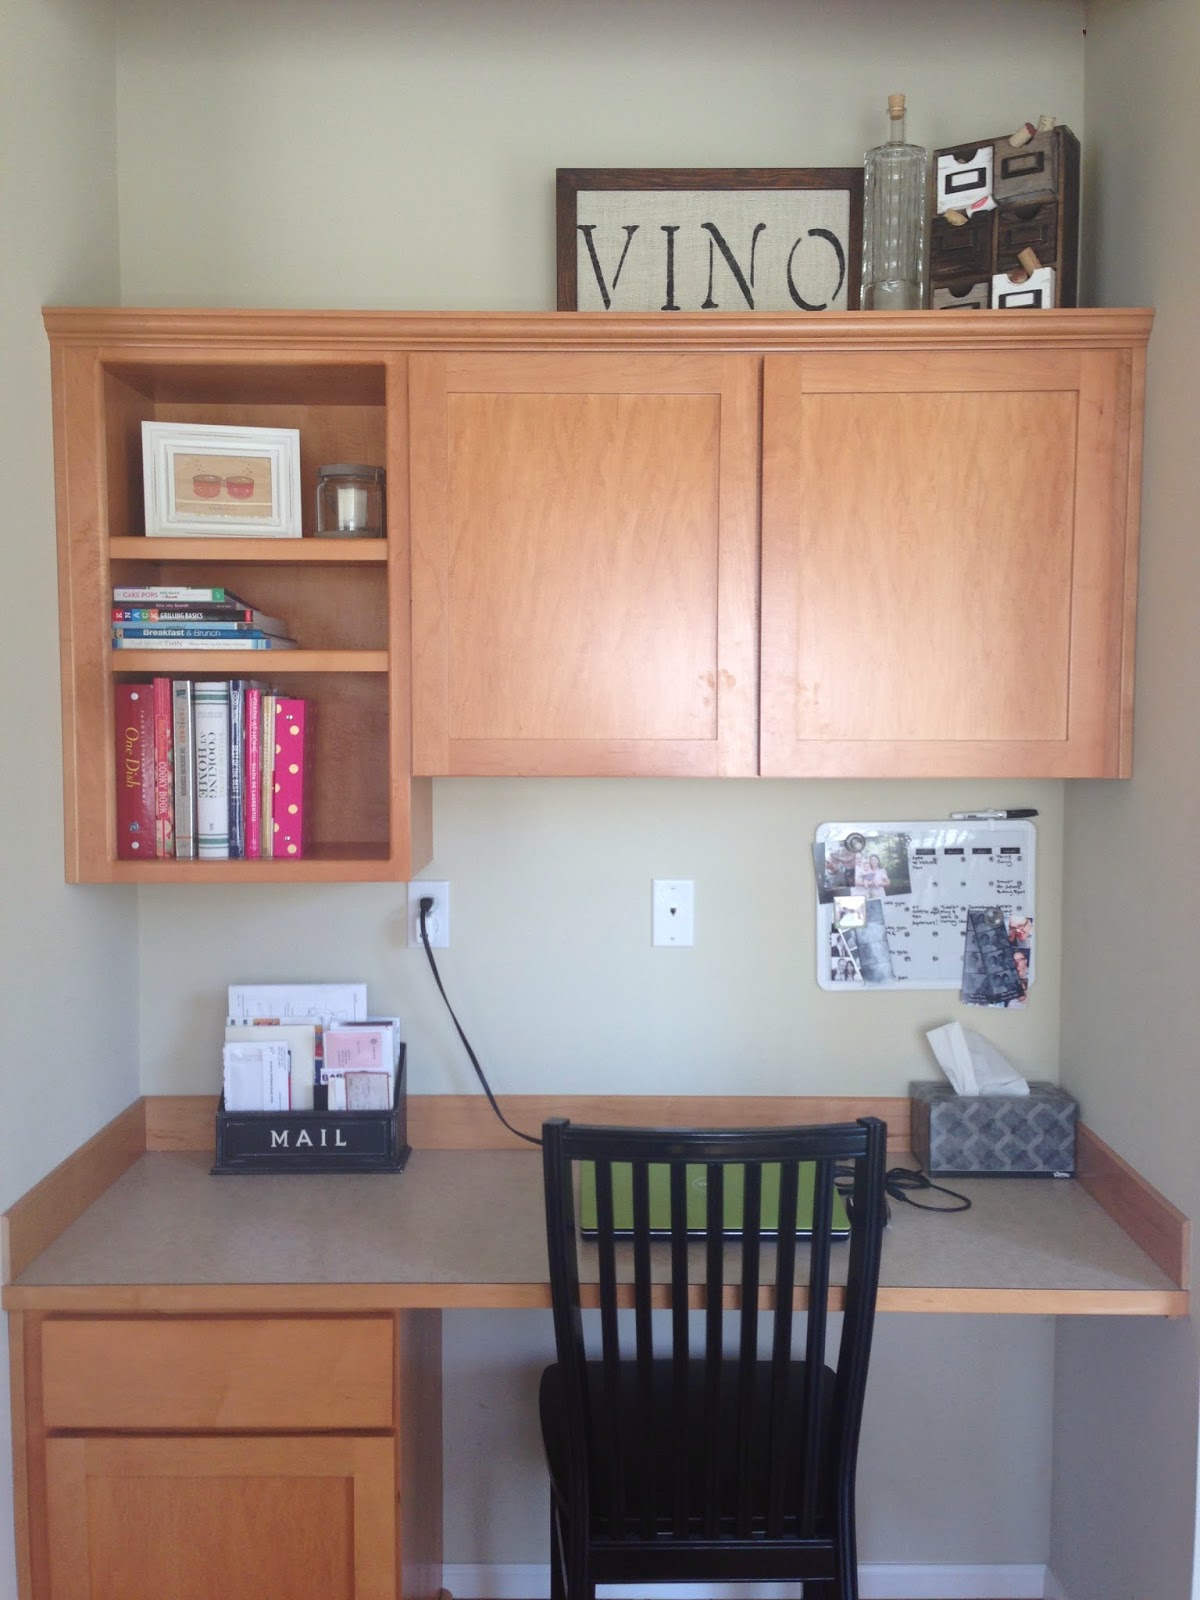
A month or so ago, I got the itch to redecorate the space above my kitchen cabinets.  Years ago, I settled in on a rustic wine theme, which I still love, but I used to switch out the decor each season - "Lemons and Limes" in the Spring and Summer and "Apples and Cinnamon" in the Fall/Winter.  These days, however, I'm really into simple, clean and timeless.

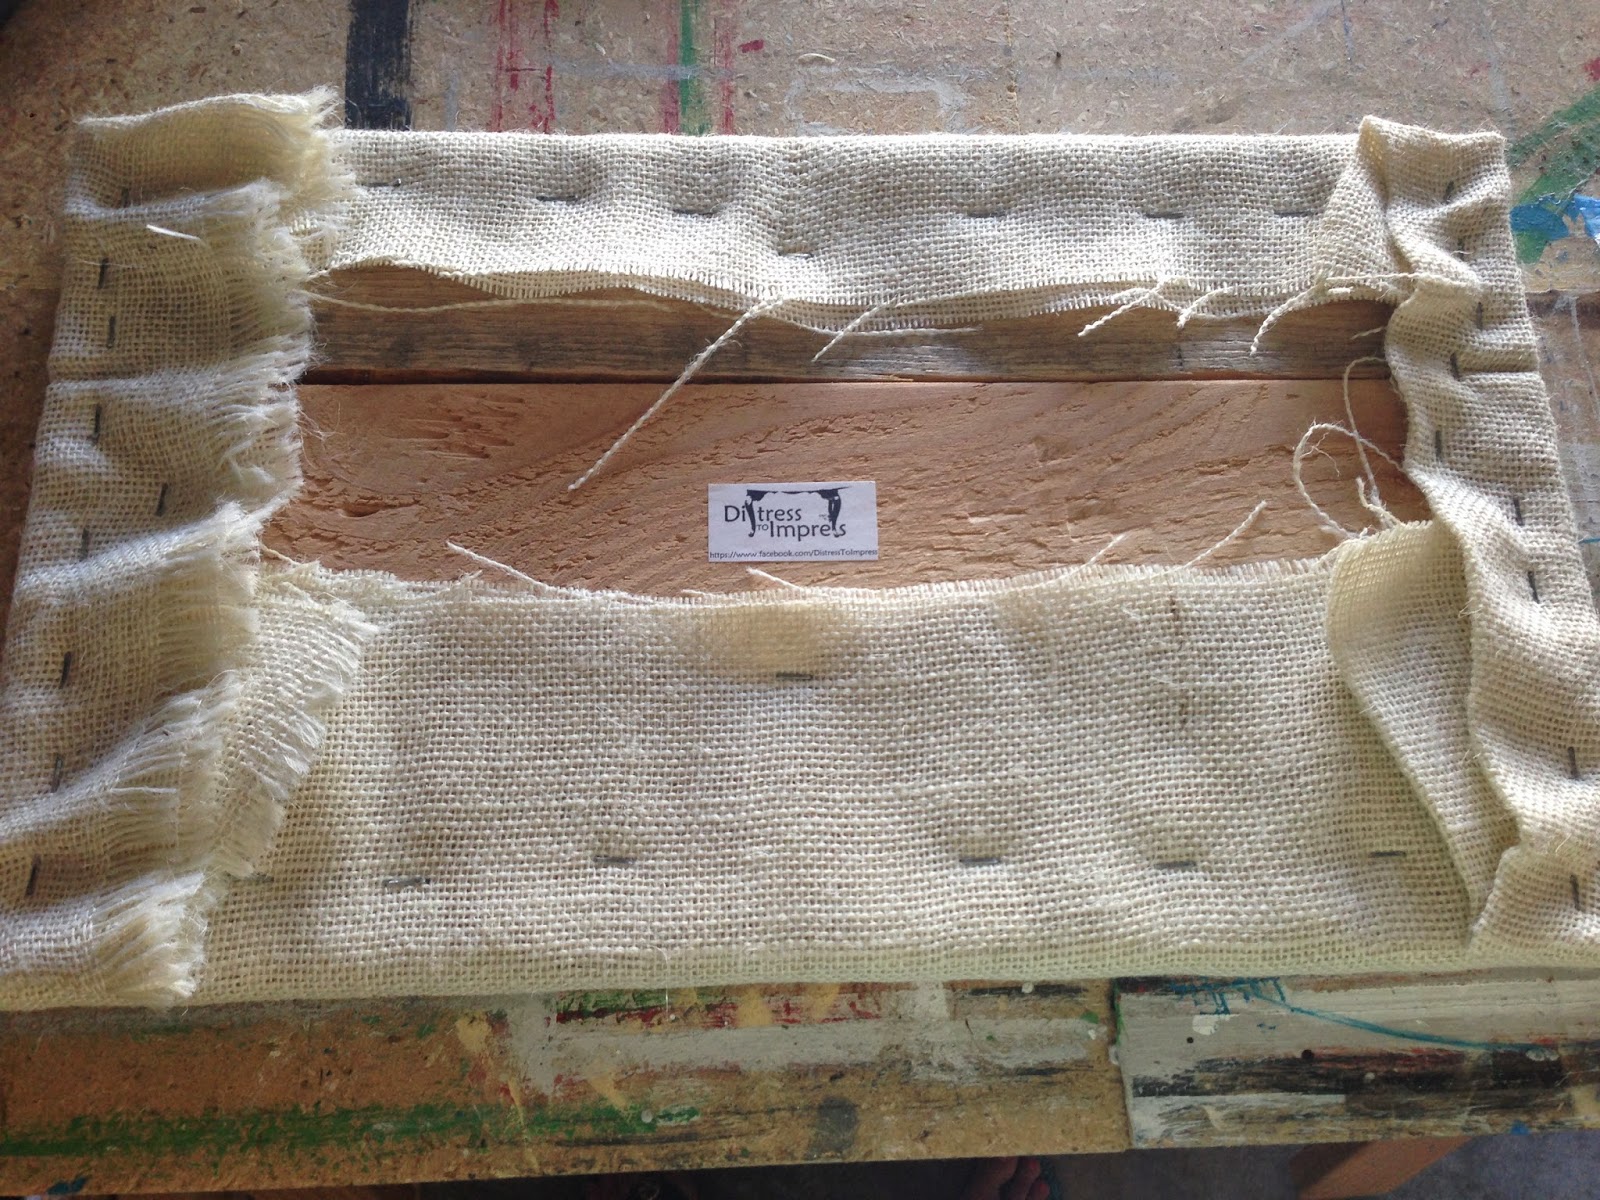
Today I wanted to share a sign that I made in about 15 minutes.  And the best part about it is that it cost me $0!  I started with some wood scraps and burlap that I had laying around the workshop.

I wrapped the wood in burlap and used my staple gun to secure the burlap to the wood.
 
 
Then I lined up and secured the stencils.  And finally used a sponge brush to apply the black paint.
 
And that was that!

I liked the sign as is, but really wanted to make it more rustic, so I of course called on my Dad to build me a frame. :)
He made the most beautiful frame, which I then stained my favorite color.

NOW we're talking!  Don't you love it!?!
And the wine bottle I found at the thrift store for $2!
 
That's a wrap for the kitchen! :)

-Ashley